



10 min read
Sharing your Superhuman Docs
Best practices for sharing your Superhuman Docs with the right people, at the right level of access.

What's covered:
- Sharing docs with a team
- Sharing docs across a company
- Using folders to share docs
- Additional sharing settings and tips
Ways of sharing
Superhuman Docs is designed for collaboration, offering multiple ways to share your doc. When you’re ready to invite others, you can decide what type of access they’ll have from the following options:- Can view: Read-only access
- Can comment: Leave feedback and comments
- Can edit: Make changes to the doc
Use the matrix below to determine the best sharing situation for your scenario, then scroll down to learn how to share your doc.
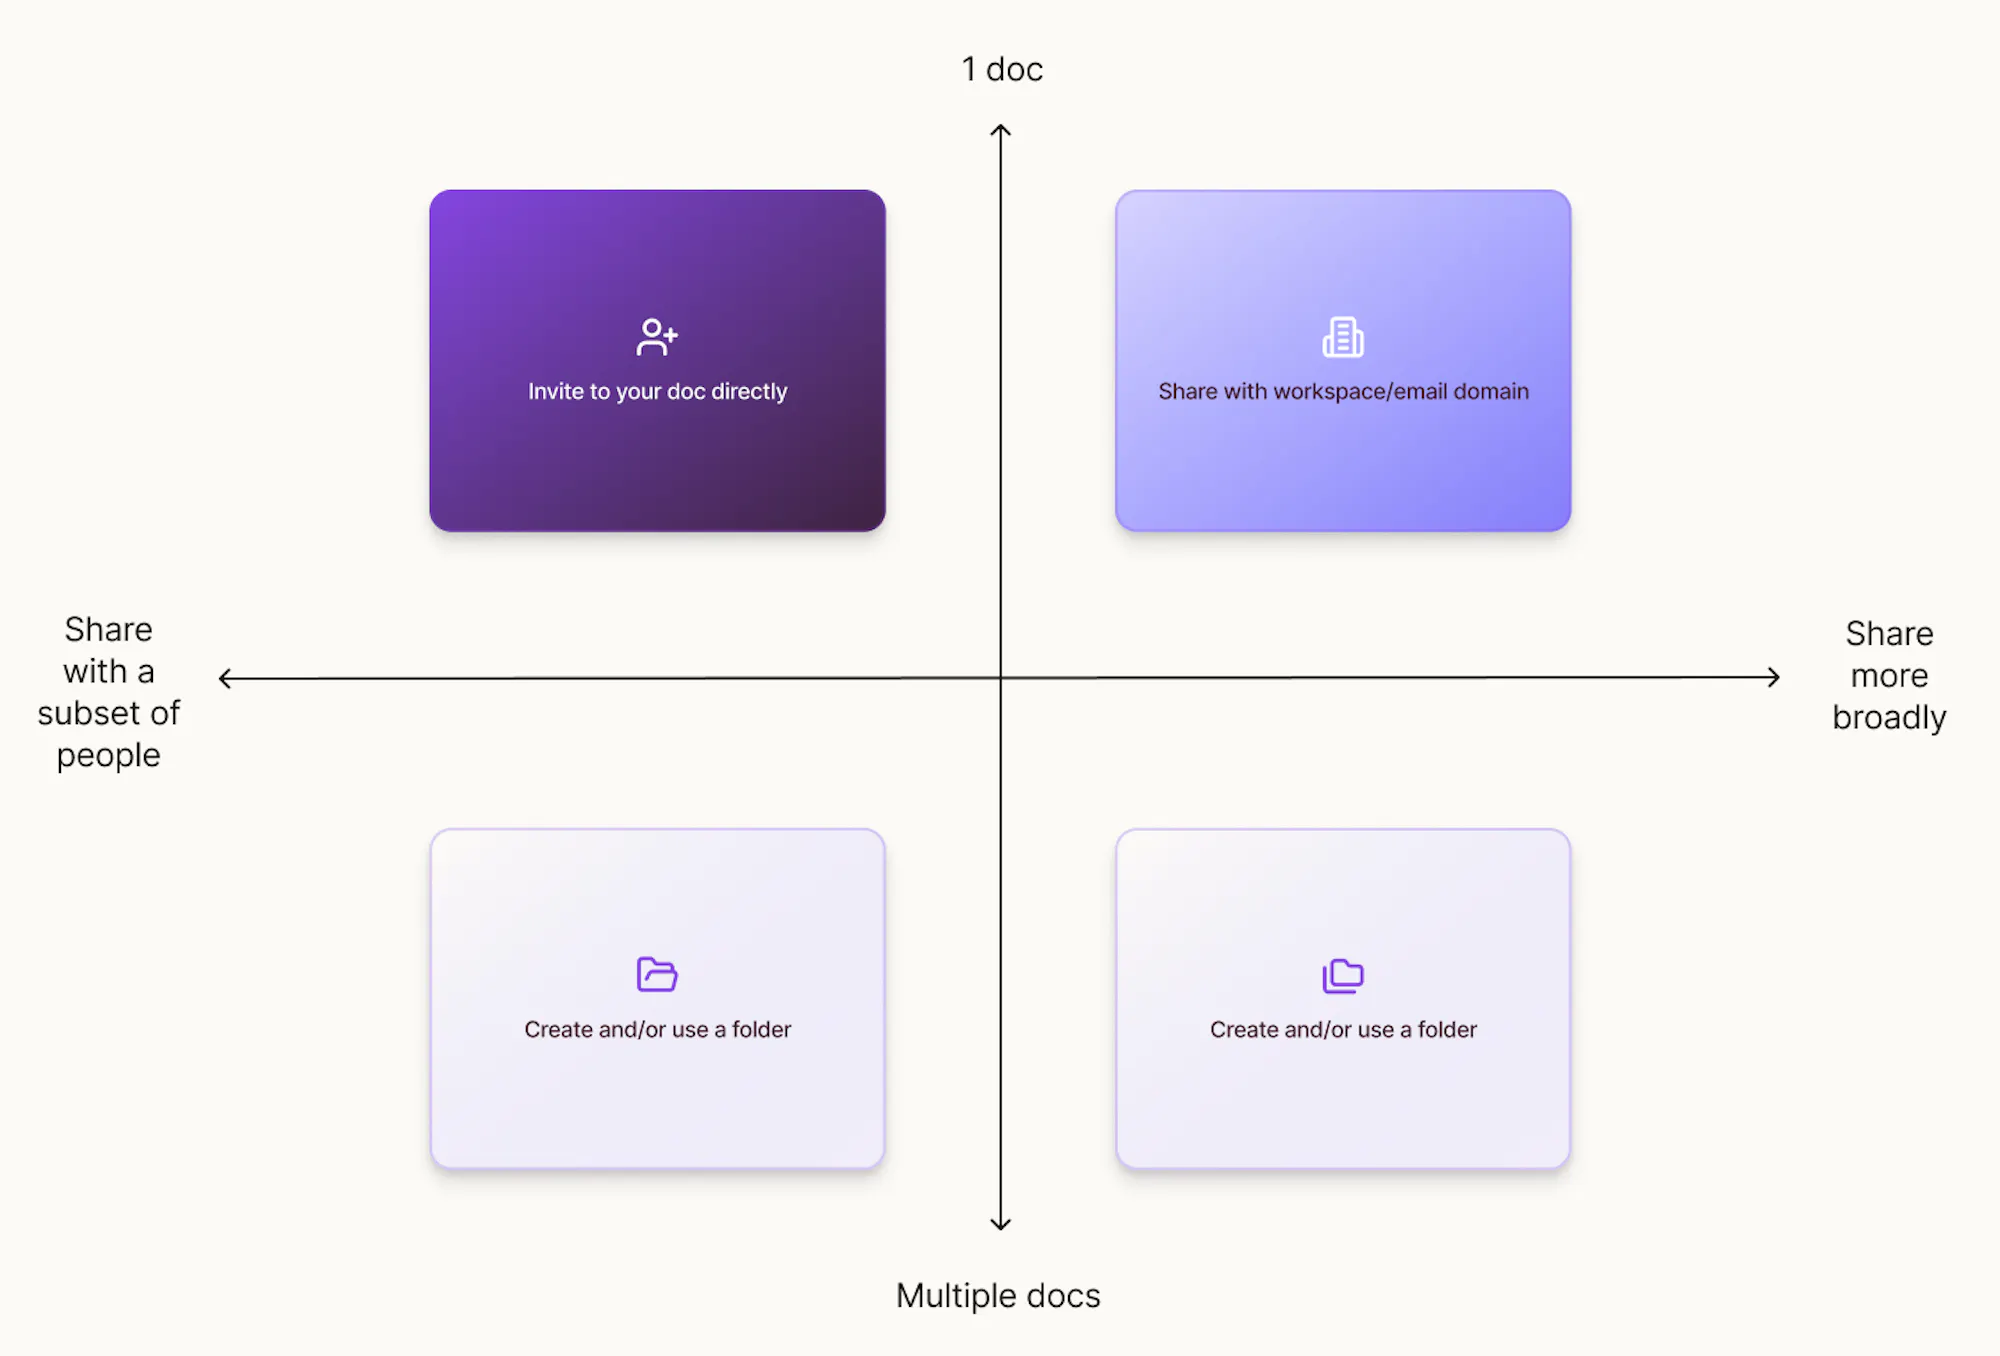
Share a doc directly
Best when you want to share an individual doc with a subset of specific people. Sharing a doc directly is best when you know exactly who should have access, such as collaborators, reviewers, or stakeholders. It’s especially useful when the doc isn’t meant for a wider audience or isn't stored in a shared folder.- Click the Share icon in the upper right corner of your doc.
- Type the name or email address of the person you’d like to share with. Their team doesn’t need to have a Superhuman Docs license for you to be able to share with them.
- Choose their access level: Can view, Can comment, or Can edit.
- (Optional) You can also use the Notify people toggle to decide whether you’d like to send them a notification or not.
Share with all members of your workspace
Best when you want to make your doc widely accessible to all team members who belong to your workspace in Superhuman Docs. Workspace sharing is the fastest way to make sure everyone on your team can find and use a doc, no individual invites needed. It works well for docs like team resources, playbooks, or anything that should be broadly visible across your organization.- Click the Share icon in the upper right corner of your doc.
- Find the option that says Anyone in [workspace name] workspace.
- If you see Anyone with a [your email domain] email address instead, click, then choose the workspace option from the dropdown.
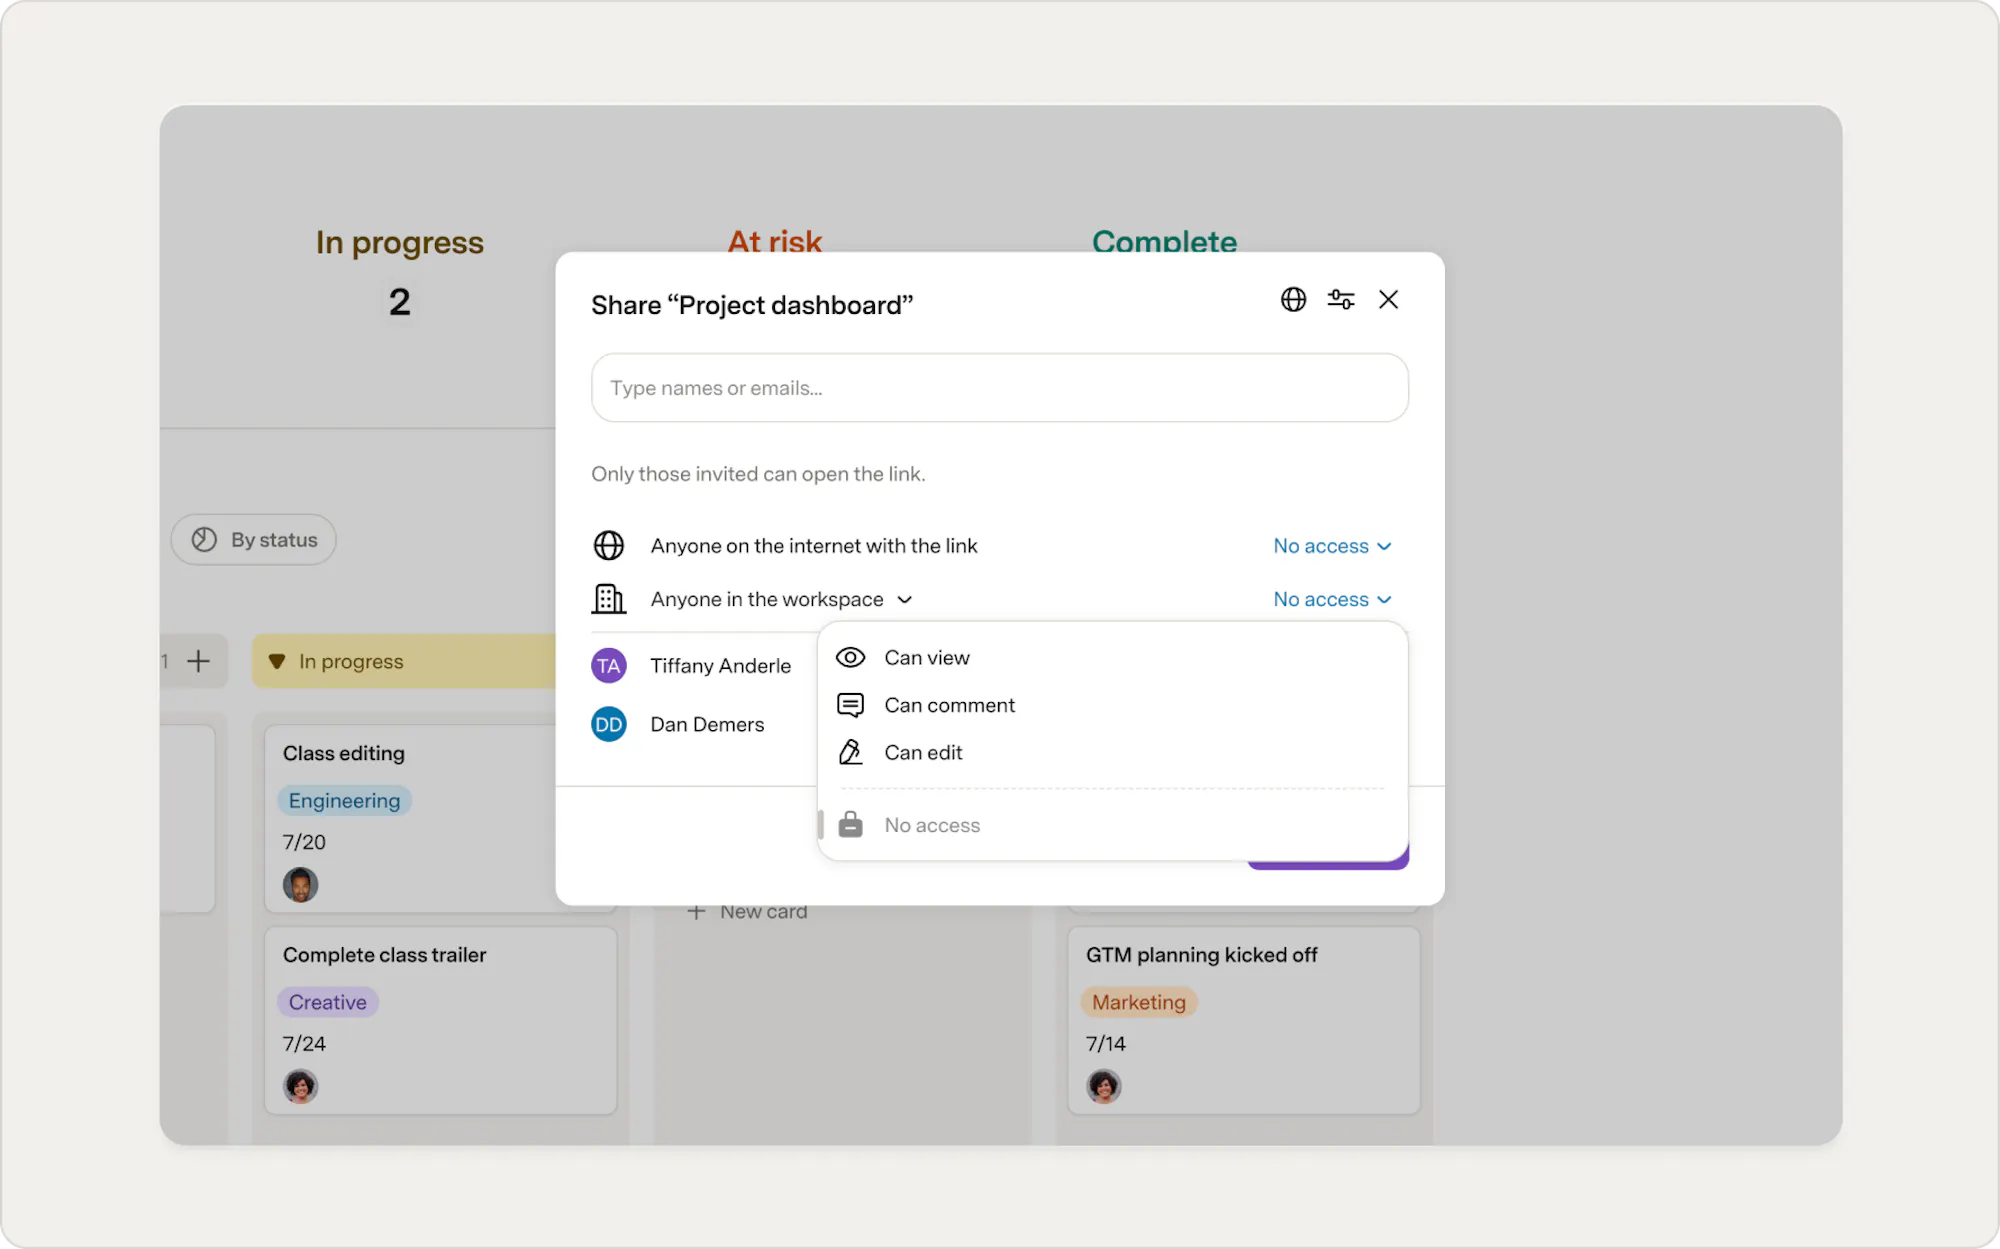
- As with the other sharing options, choose what level of access to grant these folks: Can view, Can comment, or Can edit.

Start broad, and then refine
Use Can view for wide access, and only grant edit permissions to the people who actually need to make changes.
Share with all users who share your email domain
Best when you want to make your doc widely accessible to all users who share your email domain, even if they’re not in your workspace. This helps when you work across teams or with people who don’t use Docs often.- Click the Share icon in the upper-right corner of your doc.
- Find the option labeled "Anyone with a [your email domain] email address."
- If you see Anyone in the [workspace name] workspace instead, click on their name and choose the email address option from the dropdown.
- Just as with the other sharing options, choose what level of access to grant these folks: Can view, Can comment, or Can edit.
Double-check before you open access
Since this greatly expands access, check your doc’s content before enabling domain sharing, especially for sensitive info.
FAQs on email domain sharing
How can I share my doc with a different email domain instead?
You must be the doc owner to share a doc with your domain. To update a doc's domain sharing to a different domain, follow these steps:- First, transfer doc ownership to a Superhuman Docs user with the desired domain.
- Then you (or the new doc owner) will have to update the sharing access for your old domain to "No access".
- The new owner can now open the share panel and set the domain sharing to the new domain, but only after removing the original domain and reopening the share panel.
Can I share my doc with multiple domains?
At this time, domain sharing doesn’t support sharing with multiple domains at once. If you want to switch which domain you share with, check out the previous section. A suitable alternative may be to share via workspace sharing (also shown above). This will allow you to share a doc with everyone in your workspace, including users across multiple domains.Share at scale using folders
What is a folder?
Folders help you organize docs and are usually created to easily share a collection with a department, team, or for a large cross-functional project. Anyone with access to a folder will also have access to all the docs within it. You can also control the level of access — view, comment, or edit — that collaborators have to the docs inside each folder.For example:
Let’s say you have a folder containing all the employee handbooks, shared with the whole workspace. You may want to give "Can edit" access only to members of the HR team, and give everyone in the workspace "Can view" access.Sharing the same doc repeatedly?
If you have a number of docs you regularly want to share with the same members of your workspace, consider moving them to a folder to more easily share at scale.
Create a folder
To create a new folder in your workspace, follow these steps:- From your workspace home, click the Folder tab in the left-side panel.
- In the upper left corner, click the +Create button.
- Choose Folder.
- Give the folder a name, add a description (optional), then press Create.
Share folders
You can adjust the folder's permissions to control who has access to the docs inside. When you create a folder, it is private by default. This means no one else in your workspace has access to any of the docs within that folder. You can modify these permissions and share the folder as you see fit. To share a folder, you must already have edit access to that folder. Once you do, you can simply follow these steps:- Find and click into the folder you wish to share.
- In the top right corner, click Share.
- If you wish to share the folder with your entire workspace, you can do so via the "Anyone in the workspace" option. Just click the dropdown next to this option and choose the appropriate access level (manage, edit, comment, or view).
- If you want to share with specific people, use the text bar at the top to search for and add these users. Then use the dropdown to the right to choose which level of access they should have (edit, comment, or view). Finally, click send to notify these users.
FAQs on folder sharing
Can I share a folder with anyone with a [your email address] email domain?
No, folders can be shared only with members of your workspace, either individually or with all members.What if a user is given one type of permission on the folder level, and a different type of permission for a doc within that folder?
In this case, they are given the most permissive access level between the two. For example, if Anna is granted “can edit” access to a folder and “can view” access to a doc within the folder, she will have “can edit” access to the doc, as it is the more permissive access level. If Anna is granted “can view” access to a folder and “can edit” access to a doc, she will also have “can edit” access to the doc, since that is the more permissive access.If I invite someone to a folder, will they be able to invite others to the folder?
If you grant this person edit access (“can edit”) to the folder, they will be able to invite others to the folder. If you only grant them comment or view access, then they won’t have access to the folder settings and cannot invite others to the folder.How do I remove someone from a folder?
If you wish to remove someone’s access to a given folder, you can do so by clicking into the folder, then clicking the Share button at the top of the folder’s page. This will open the folder's share dialog. You should see everyone with access to the folder listed here. Find the person you wish to remove, click the dropdown to the right of their name, and select Remove.Other things to know about sharing
Default sharing settings
You may be wondering, “When I create a new doc, what folder is it added to?” Default settings depend on where a doc is created (that is, which folder). If you create a doc in your My Docs folder, it will automatically be private and accessible only to you. If you create the doc in any other folder, its sharing settings will be determined by that folder's sharing settings. That means anyone who has access to the folder will also have access to the doc.Advanced doc sharing settings
When you open up the Share settings for your doc, you’ll see a slider icon in the upper right of the pop-up. Click this to open the advanced sharing settings. Here, you’ll find the following key options to give you even more control over sharing your doc:- Allow anyone who can edit to change permissions and share. This setting allows anyone with edit access to your doc to also have control over sharing that doc. If you’d like to prevent others from modifying access to your doc, toggle this setting off.
- Allow anyone to copy this doc. This setting controls whether people with access to your doc can make their own copy. With this setting off, editors, viewers, and commenters will no longer have the option to copy the doc, including from the top left-hand corner of the doc or via the Copy doc button. This setting is toggled on by default, and you must be the doc owner to change it.
- Share with Superhuman Support. Use this only if you’re in conversation with a Superhuman Support team member and have discussed sharing your doc.
Publishing your docs
Publishing is another way to share docs that focuses on beautifying your docs for a wider audience. It creates a ‘cleaner’ URL, like superhuman.com/@profilename/docname, that directs people to a version more fit for public consumption. There are many publishing-specific settings, including the option to publish to a custom domain and to have your published doc searchable on Google. You can choose for the doc to be displayed in view/play/edit mode. This applies to anyone who visits the published link. Note that sharing access is stacked on top of the view/play/edit mode, so the most restrictive display setting “wins”. If someone has edit access to a doc whose published version is set to “view,” they will not be able to edit the published version. To learn more about how to publish, use this help article.Now what?
Check out some additional resources for building docs that are easy to navigate, so your team doesn’t just receive them, but actually uses them.Was this helpful?
YesNo